Lizmap Web Client configuration
Introduction
The Lizmap configuration menu is divided into 2 parts:
Services: the general configuration of Lizmap Web client - server, cache, etc.
Repositories: create and configure Lizmap repositories
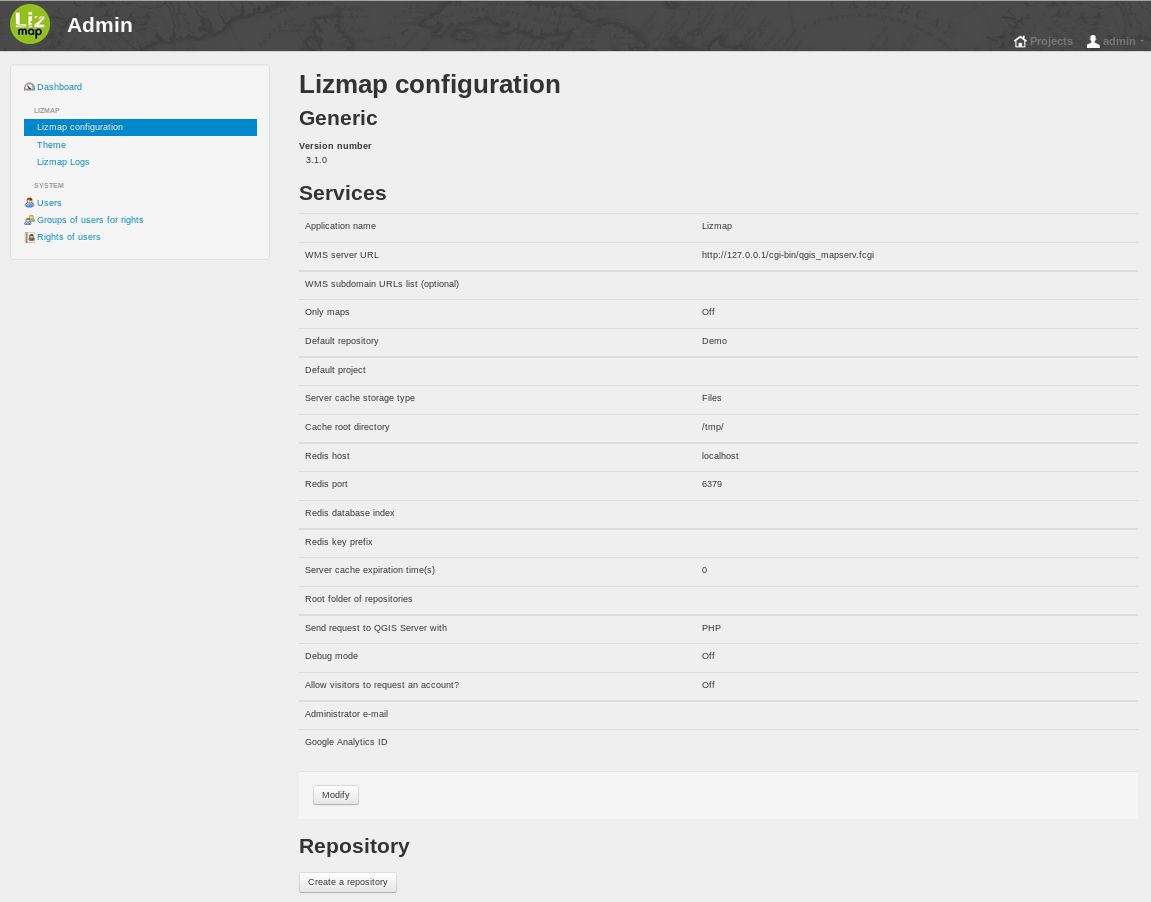
Services
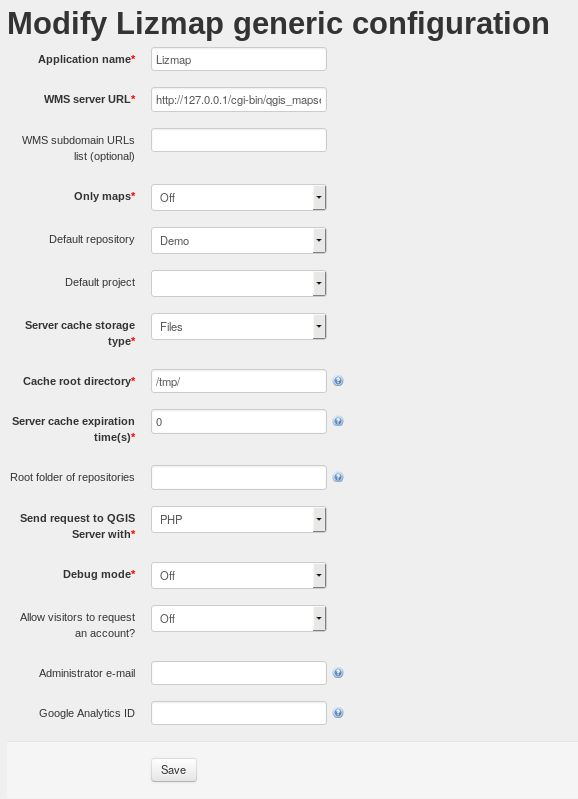
To configure Services, click the Modify button under the summary.
WMS server URL: The full QGIS Server URL, such as http://localhost/cgi-bin/qgis_mapserv.fcgi or http://localhost/cgi-bin/qgis_mapserv.fcgi.exe.
Warning
QGIS Server must be installed on the same computer as Lizmap Web Client
WMS subdomain URLs list (optional): The use of multiple domain names is one of the classic optimizations when a web application uses OpenLayers (as Lizmap Web Client). You can enter a list of subdomains separated by comma.
You must use a list of subdomains relative to the domain with which is used Lizmap Web Client. For example, if your main domain name is maps.example.com, then you can use a.maps.example.com, b.maps.example.com, c.maps.example.com, d.maps.example.com.
Of course you must have configured the Apache/Nginx server virtual host to take into account these subdomains, for example with the variable:
ServerAlias \*.maps.example.com
Server cache storage type
file: Tiles cached are stored in a server directory by layer
sqlite: The tiles are stored in a sqlite database by layer
redis: the tiles are stored into a Redis database
Cache root directory: the folder where the cache is stored. It must be writable by the Apache/Nginx server.
Server cache expiration time (s): the time in seconds during which each tile is retained. This is a default value for layers whose time has not been configured with the plugin.
The cached tiles older than that time are automatically refreshed.
A value of 0 means that the tiles do not expire.
The expiration time must be adapted to changing data.
Send request to QGIS Server or external service with: 2 methods php or curl. Use first if curl is not installed on the server.
Debug mode: saves some queries to a log file: lizmap/var/log/messages.log
Allow visitors to request an account: If this option is enabled, a new link ‘Registration’ will be added in the public menu. By clicking on this link, the visitor displays a form that allows it to request an account to administrator. He must complete some fields (name, email, due to demand) then validates the form to send the request.
Administrator e-mail: If a valid e-mail address is given, then the Lizmap Web Client notifications will be sent. For example, each account creation request via the registration form generates an email sent to this address.
sender e-mail and sender name: when Lizmap sends an e-mail like notifications or for password reset, if needs the email address and the name of a sender.
proxy for External requests
Lizmap may need to access to some internet services. So, if it is installed behind a web proxy (typically in an intranet), you need to indicate what is the proxy.
You should check the checkbox “Use a proxy server” and fill these fields:
Host of the proxy server: the address of the proxy
Port of the proxy server: the tcp port of the proxy
Type of the proxy: the protocol used to access to the proxy: http or socks5. It is only supported when curl is used.
Login and password: sometimes an authentication is needed to access to the proxy
Domains for which the proxy will not be used: there are some requests that should not go to the proxy, typically requests to your QGIS server, or requests to a local server that serves map backgrounds etc… You have at least to set it with “localhost,127.0.0.1”.
Repositories
For each Lizmap repository, are listed:
The main informations: label and path
The list of rights with the groups concerned
Action buttons:
View: displays a page that lists the maps in this repository
Modify: displays the repository modification form
Remove: delete the repository from the Lizmap Web Client configuration
Empty cache: deletes the entire cache of all layers of the repository projects

You can create a new repository using the button Create a repository located at the top and bottom of the section Repositories.
Add a repository
To create a repository, you must give:
an id: a word without spaces, accents or special characters
a label: the name that will be displayed for this repository, accents and spaces allowed
a local folder path: the full path on the server to the folder that contains the QGIS projects and data
Allow repository themes: This option enables the possibility for the publisher to set a theme for the repository and themes for each map. See Creating simple themes.
Define the rights for each group
After creating the directory, the repository modification form is displayed automatically and defines the following rights for each group:
View repository :
all users of checked groups can access maps of this repository
the group anonymous is unregistered users and allows to make public maps
Use the Edition tool
When this option is checked, the group users have access to the editing tool for all of Lizmap repository maps for which the edition was configured.
Always see complete layers data, even if filtered by login
This option is in connection with the filtering feature data layers per group. See Filtered layer by user — Set some features visible/editable or not for some users. Check the box for deciding which groups can see all the time all the data, even when a filter is active on some layers.
